Showing posts with label royal icing. Show all posts

Monday, 15 July 2013

Cake twenty-six Sicilian Cassata

Get inspired

It’s a cake which steals a lot of your time and patience of course. It’s not too difficult to make, anyway: you need some practice to get to the right combination of good taste and elegant decoration but it’s well worth a try! 
Consider one day to bake and assemble it, then another day in the fridge before decoration and a couple of days before eating so that all the flavours can harmoniously blend in.

Step 1 - Sponge Cake
6 eggs, separated
250 g sugar
250 g flour
Beat yolks and sugar with electric mixer until thick and foamy. Fold in flour. In the meantime beat egg whites with electric mixer until soft peaks form. Gently fold a little of the beaten egg whites into the batter to lighten it and then add the rest of the whites folding just until incorporated. Do not overmix the batter or it will deflate. Pour mixture evenly into a 20cm-round tin and bake cake at 180° for about 30 min.  or until a toothpick inserted into the center of the cake comes out clean. 
Immediately turn cake onto a wire rack prepared with baking parchment to cool.  

Step 2 - Ricotta filling
1 kg fresh ricotta
250 g sugar 
100 g chocolate, chopped 
Should ricotta be too wet, place it on a colander for about 30 min. Then whip ricotta and sugar with an electric mixer until well blended and smooth. Fold in the chocolate. Refrigerate.

Step 3 - Marzipan
200 g marzipan 
green food colouring
Knead marzipan and some green food colouring until you get a vivid green and the colour is uniform.

Step 4 - Cake assembling
sponge cake
green marzipan 
some vermouth 
ricotta filling 
plastic wrap
Line a 30cm frying pan with plastic wrap. 
Roll out a 10cm wide marzipan stripe. Line the side of the pan as in photo. Cut the sponge cake into 1cm thick slices and use them to line the base and sides of the frying pan. Sprinkle some vermouth over the slices until they’re moist but not wet. Spread ricotta filling evenly over cake base. Top with remaining cake slices and sprinkle vermouth over cake. 


Refrigerate for at least one day.

Step 5 - Royal Icing
2 egg whites
375 g icing sugar
some lemon juice
Whip egg whites and sugar with an electric mixer until hard peaks form. Pour in some lemon juice.

Step 6 - Cake assembling
Cake in the frying pan
Royal icing 
Candied fruit: cherries, citron, a tangerine, or any fruit of your choice.
Turn Cassata onto serving plate. Discard plastic wrap.


 Decorate the cake to your taste. Refrigerate for 3/4 hours at least.


also visit:

Sunday, 10 March 2013

Cake nineteen - Father Xmas's House - Assembling the house

Get Inspired

Step 4: Assembling the house  
This is in my opinion the most difficult and delicate phase. You need not to hasten to assemble the house all at once and wait the necessary time until the icing has stuck the various parts together. 

Doors and windows
You need some glacé icing (white, green and red), fish glue sheets and sugar decorations to your taste. 
Glacé icing 125 g icing sugarfood colours to your taste2 teaspoons water

Mix sugar and water well, then add some drops of colour until you reach the shade you want.

Decorate doors and window shutters with icing and sugar decorations as shown in photos. Wait until icing is well dry. In the meantime place the walls with holes for the windows upside down onto some parchment paper. Pipe some icing at the corners of the windows, put a fish glue sheet (the window glass)
over the hole and press it very well so that the icing can make the ‘glass’ stick to the wall. When icing is dry, place decorated shutters at each side of windows. Don’t forget to hang your Xmas wreath above the door!

House 

You need a big quantity of royal icing (four egg whites)
Royal icing 
1 egg white 
220 g icing sugar
Beat egg white in a bowl with an electric mixer, add icing sugar, a tablespoon at a time. Beat until icing reaches firm peaks. 

Now take the biggest rectlangle and put it onto a big tray, the tray should be of about 1m x 50/60 cm. Use some icing to draw the perimeter of the house in the middle of the rectangle. Pipe some icing along the side walls of the front wall and one side wall. Place side and front wall onto the corresponding side along the perimeter. Press them together and wait until icing is dry. Then do the same with the back and the other side wall. Now position the inside wall in the middle of the house. Always use some icing as glue. 
Wait until icing is well dry. In the meantime put the door in the right place and build the fence. Now cut the rectangle for the roof in two, and position the two parts onto the hosue walls. Always use enough icing as glue. When icing is dry, stick the 20 bricks onto the front and back walls and the chimney onto the roof. Cover the house with snow.

Park
Make your trees look white with snow. Then put some of them at the back of the house and some in the front. Put reindeer in the front garden. Cover the park with some snow. 


also visit:
http://time-for-a-cake.blogspot.it/2013/01/cake-nineteen.html

Monday, 31 December 2012

Cake seventeen - Christmas Fruit Cake

Get inspired


This is undoubtedly my favourite cake! It’s good, easy to make and can take any shape you want. I usually make three or more of them for Christmas: a square one decorated as a gift, a star, a Christmas tree and smaller ones in the shape of trees, stars or snow flakes.You can make it one month ahead, you only have to wrap it up well in aluminum foil and then decorate it the day you need it. The longer you keep it wrapped, the better all the ingredients blend together.                         
In my family, we love to have the smaller Fruit Cakes at breakfast during the whole Christmas holidays. 
I also make some smaller ones with margarine as my daughter is intolerant to lactose and they taste delicious anyway!

250 g butter
250 g sugar
5 eggs
juice and rind of 1 lemon
2 cl rhum or vermouth
250 g flour
1/2 teaspoon cinnamom
1/2 teaspoon grated nutmeg
150 g cherry candies
400 g raisins
100 g.  finely cut candied oranges
100 g. finely cut candied cedar
100 g chocolate chips
(if you don’t like candied fruit you can put more chocolate)

Beat butter and sugar in a bowl with electrtic mixer until creamy, and white. Add eggs one at a time and don’t forget some flour after each addition. Beat in rest of flour cinnamon, nutmeg, raisins, cherry candies, candied oranges and cedar and chocolate chips. 
Pour mixture into lightly greased mould. Bake at 180° for 1 hour or more depending on the size of mould. 

Decoration
You can decorate the cake as you like or simply leave it without any decoration, as it looks nice too. It all depends the day you’re making it for. 
For Xmas Day I like it all white (glacé or royal icing- at your choice) or all black (ganache).

Glacé icing
320 g icing sugar
1 teaspoon butter
2 tablespoons hot water, approximately
Sift icing sugar into small heatproof bowl, Stir in butter and enough of the hot water to make it a thick paste. Place bowl over small saucepan of simmering water. Stir until icing is spreadable

Royal icing
240 g icing sugar
1 egg white
1/2 teaspoon lemon juice
Lightly beat egg white in small bowl with electric mixe, add icing sugar a tablespoon at a time. When icing reaches frim peaks, beat inn juice.

Dark Chocolate Ganache
200 g dark chocolate, chopped coarsely
125 ml cream
Bring cream to the boil in a small saucepan, remove from heat. When bubbles subside, add chocolate. Stir until smooth.

also visit: http://time-for-a-cake.blogspot.it/2012/12/cake-seventeen.html

Friday, 2 November 2012

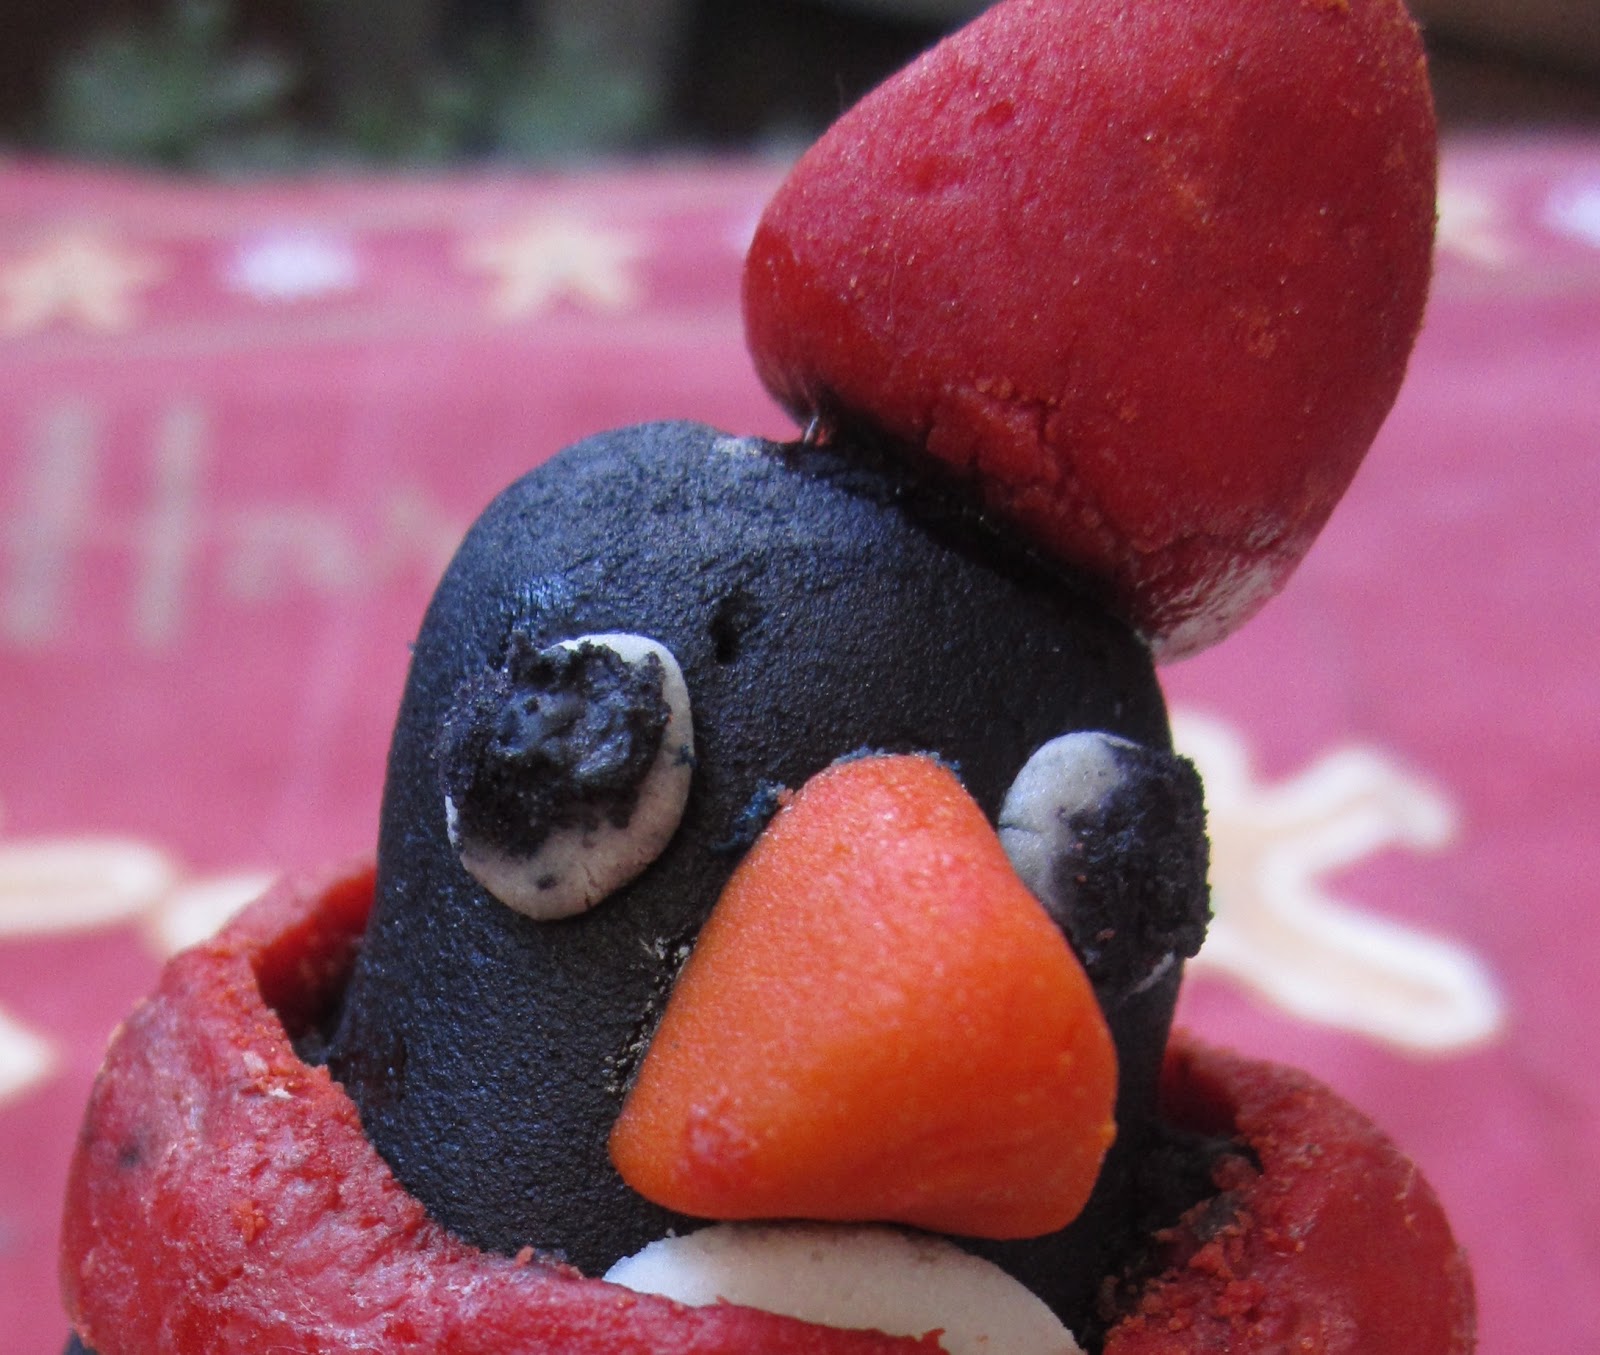
Cake twelve - A solitary Penguin


Get inspired


When decoration is more important than the cake itself.

Not all cakes need an elaborate decoration, some don’t have any at all and look gorgeous anyway, it all depends on the recipe and most of the times on the occasion we’re making them for. Cupcakes are very often the hidden structure of creative decorations which sometimes look like works of art. But here comes a big problem: how can you eat your creation after all your efforts? 

Any cupcake recipe is fine, I always choose vanilla cupcakes (see cake five) and add some grated lemon peel.

Decoration 

You need to make some fondant for the penguin, some royal icing for the penguin’s island and then some glacé icing for the nearby rocks and to cover all with snow.
I must say I was pretty scared to make fondant, I thought it was a kind of ‘mission impossible’, but with much patience and my younger daughter’s help I’ve made it! I’ve discovered kind of another galaxy of cake decorations: I’m a true fan of fondant now!

Fondant 

1 tablespoon egg white
1 tablespoon glucose syrup or light corn syrup
about 180/200 g icing sugar 
Put the egg white, syrup and about a quarte of the icing sugar in a bowl and mix to a smooth paste. Continue to mix in more icing sugar until it becomes too stiff to stir. Turn the paste onto the work surface and knead in more icing sugar to make a smooth, stiff paste. (don’t make it too soft or sticky, you’d have some difficulty when working it).
Add any coloring you need and wrap tightly in several thicknesses of plastic wrap, unless you’re going to use it immediately. It’s gonna be more difficult to work if it’s summer or you live in a hot country!

Royal icing

1 egg white - 200 gr icing sugar 
Put the egg white in a bowl or in a and whisk lightly to break it up. Work in the icing sugar until the icing has a thick and smooth consistency that just holds its shape.

Glacé icing 
200 gr icing sugar - 4 teaspoons water 
Combine icing sugar and water until smooth. Add water a little at a time until the consistency is smooth and the icing just holds its shape.

Making the penguin

What we need to make one penguin:
4 vanilla cupcakes
one teaspoon of orange jam
1 quantity glacè icing 
80 g black fondant
small pieces of orange, white and red fondant
1 raspberry gummy drop
black food colouring

1) The Penguin’s Island

Take one cupcake and spread it with some orange jam using a small spatula. Spoon some royal icing on top of the orange jam and spread to the edges. Drag a little icing over the side to form an icile-shaped point and then continue all around the edge of the cupcake creating iciles of varying lengths.

2) The Penguin

Divide the black fondant into two pieces, a bigger one of about 60 g and a smaller one. 
Mold the biggest piece of black fondant into an oval shape (lighlty dust your hands with some icing sugar). Flatten the base lightly and put it on the cupcake..
Draw one wing on parchment paper. Then divide the rest of the fondant into two pieces and roll them out thinly on the work surface. Place the wing template on the rolled fondant and cut two wings. Secure the wings in place with a damped paintbrush.
Now take a pea-sized piece of orange fondant and cut in half. Flatten each half and make two indents using a sharp knife. Position the feet in front of the body. For the chest, thinly roll out the cut fondant and cut an oval shape (3 x 3 cm). Secure to the front of the penguin with a dampened paintbrush.

3) Face

Shape a small triangular beak in orange fondant and secure in place with a dampened paintbrush. 
Make two tiny balls of white fondant, flatten them a bit and push them into the black fondant either side of the beak for eyes. Paint the centers of the eyes using a paintbrush and black food colouring. 

4) Hat and scarf

Make a small ball out of the red fondant, flatten the base and secure it to the top of the penguin’s head with a little of the glacè icing.
Thinly roll out the rest of the red fondant and cut out the scarf. Wrap around the neck and press gently. in place. Cut out two shorter lenghts of red fondant for the scarf ties. Cut decorative tassels at one end of eacj lenght, then secure to the front with a dampened paintbrush. 

5) Rocks and Snow

Use the other three cupcakes to make other rocks around the penguin, leave some space around the penguin to give better the idea of the sea. Cover the rocks and the areas around them with glacé icing.


also visit:
http://time-for-a-cake.blogspot.it/2012/10/cake-twelve.html
                                               

Cake eleven - Dough friends

Get inspired

This is a delicious sweet dough you can easily mould into any shape you like. You can use it for wrtings too, like my ‘Benvenuti’ for example! I personally love dough writing... It makes me feel like a child playing with Dido!

Your ‘dough friends’ can be brownish, the colour of bread, or you can have fun colouring them with the brightest colours. What you only need is to set your fancy free!

600 gr flour
40 gr yeast
1/4l lukewarm water
100 gr butter (melted)
2 eggs
a pinch of salt
60 gr sugar
grated lemon rind (1 lemon)
1 extra egg

Put flour, yeast and sugar in a large bowl, add milk. Combine yeast, milk, some sugar and some flour. and mix to a small dough ball. Cover, stand in warm place for about 15 min. Stir in the melted butter, eggs, salt and lemon rind. Mix all the ingredients very well, cover and stand in warm place fur further 15 min.  
Make your own your paper templates, use parchment paper and it won't stick to dough!
(You'll find my templates in the page)
Turn dough onto floured surface, knead until smooth. Roll dough to about 1 cm thick. Cut out your ‘friends’, whisk egg and brush them. Stand in warm place for 15 min. 
Bake at 180° for 10-15 min.
Decoration 
Icing 
You can choose between two types of icing: 
Royal icing
1 egg white- 200 gr icing sugar 
Put the egg white in a bowl or in a and whisk lightly to break it up. Work in the icing sugar until the icing has a thick and smooth consistency that just holds its shape.. This icing is very good for details.
Beat in any food colouring adding a little at a time until the desired shade is reached.

Glacé icing 
200 gr icing sugar - 4 teaspoons water 
Combine icing sugar and water until smooth. Add water a little at a time until the consistency is smooth and the icing just holds its shape. This is the simplest icing to make and can be used for broader surfaces before adding further decorations, but it doesn’t hold its shape as well as royal icing.

Parchment paper templates

Here are the two stencils I've made for my 'Dough friends'