Tuesday 31 December 2013

Cake seventeen - Xmas Fruit cake - 2013

Get inspired

This cake’s undoubtedly another Xmas must have! It’s quite easy to make, but pay attention to the right baking time, Anyway it’s better to bake a little bit longer so that flavours can blend together well. Then the longer you store it the nicer it smells and tastes - one month is a good period of time, in my opinion Storing time does make the difference! I think you should try it yourself. I do love this cake, you can make it in any shape: my favourite moulds for Xmas are trees or stars, whether smaller or bigger, but if you use a square or round pan it looks traditional and if you put a ribbon around it and a decoration in the middle, something like a Xmas tree candle holder it looks quite elegant and original. 
But this cake hides another secret! You can change some of the ingredients and there you have another cake! The original recipe is with candied fruit, raisins and almonds, but I never put almonds - we don’t like them much - and use chocolate instead! And for chocolate lovers use white and dark chocolate without candied fruit or raisins. It taste delicious, believe me!

for recipe see cake seventeen 

As you see, this year, I decorated the big Xmas tree in green with little red Xmas balls using cream cheese frosting and tiny chocolate rounds. 

Cream cheese frosting
green food colouring 
300 g cream cheese or mascarpone
200 g icing sugar
Mix cream cheese and icing sugar together until they’re well blended together. Add as much green colouring as to reach the shade you like. Refrigerate for at least one hour.


Red Xmas balls
100 g White chocolate
red food colouring.


Melt white chocolate over a bain maire. Cool it. Add some red colouring until you get the shade you want. Pipe small rounds on baking paper or better on a silicon baking mat. Refrigerate.


Sunday 29 December 2013

Cake nineten - Santa's House 2013 edition

Get inspired

It’s been long since I first attempted to make a gingerbread house but every year I’m as thrilled as the first time I made it and I note down some little changes to make the next time. This time I used  a sugarless dough for the house external walls, the trees and sleigh and it really proved very good to look at but quite weak to bear the weight of the roof. So we had to make other walls with the old style (I mean the one we’ve always used) dough and stick two walls together - one made with the new dough and one with the old using some brownish icing as glue. Another new thing was to bake the roof in two parts and bake them twice so that they become harder. 

Sugarless gingerbread dough
200 g butter 
500 g honey
2 tsp ginger, pepper, cinnamon and muscat nut
15 g cocoa
1200 g flour
1 packet baking powder
1 pinch salt
2 eggs
same proceeding as in Cake nineteen
http://time-for-cake-making.blogspot.it/2013/03/cake-nineteen-father-xmass-house.html

for ‘old style’ gingerbread dough see link above

for assembling advice see:

http://time-for-cake-making.blogspot.it/2013/03/cake-nineteen-father-xmass-house-making.html


http://time-for-cake-making.blogspot.it/2013/03/cake-nineteen-father-xmass-house_10.html

 House details:
1. House grounds and trees


2. Front wall, window with flowers and wreath
 3. Side walls and window 


4. Inside wall with door and Santa Claus


5. Inside the house 


6. Sides and back


 7. ready!


 also visit http://time-for-a-cake.blogspot.it/2013/12/cake-nineteen-2013-edition.html


Saturday 28 December 2013

Cake thirty-one The Duchess Cake

Get inspired

It sometimes happens I have an idea in mind which I think it’s perfect but then when it comes to the actual realization .. it turns out totally different... Do I get mad about it? Of course I do.... but I try to keep calm and consider it like a challenge between the cake and me: I must win anyhow! No good reason to give in.. anyway, a good chance to use my creativity and make something even better.The Duchess Cake is an example, in fact. It was my elder son’s graduation family dinner and I wanted to make a splendid cake for the occasion.

 I let him choose the cake, and I liked it too, quite a solemn cake, suitable for the event. But, while making it, I got more and more disappointed: the cake was nearly ready and looked like a white omelette tier cake! I felt desperate at first, but after a few minutes I had a new plan..  I baked some eclairs, and used all the former cake components to make a totally new cake, an elegant and quite sumptuous cake: no doubt about the name to choose - it was a duchess cake. Why duchess? No logical explanation, simply a stream of thoughts of pictures in my mind: in a moment’s time a flashback from some fairy tale books, royal receptions with ten meter long tables full of cakes and young princesses strolling along huge ball rooms. There it was my cake, the cake for a duchess, for sure!

Here’s what you need to make: (preparation’s quite long, I must say...)
Meringue Cake
Éclairs
Pastry cream
Choco Cream 
Chocolate decorations

Step 1 - Meringue Cake
6 egg whites
200 g icing sugar
1 tbs starch
80 g icing sugar
80 g grated almonds
Preheat the oven to 110° C. Pencil a 24cm circle on four baking paper sheets. 
Beat the egg white on medium speed with an electric mixer until the mixture resembles a fluffy cloud and stands up in stiff peaks when the blades are lifted. Now add icing sugar, a spoonful at a time, continue beating for 3, 4 minutes between each addition. Continue to fold in the remaining icing sugar until the mixture looks thick and glossy. Fold in starch and grated almonds. Spoon the meringue on the 4 circles and bake them for about one hour, until they’re crisp and you can lift off the paper easily. Leave the oven door slightly open with the help of a wooden spoon. Leave to cool completely.

Step 2 - Chocolate decorations
200 g dark chocolate
Place the chocolate in a heatproof bowl over a pan of simmering water. Allow the chocolate to melt so that it is smooth, shiny and glossy. Spoon some on an aluminum foil paper and make 20 small thin rectangles of different sizes.

Step 3 -Pastry cream
3 egg yolks
250 ml milk
75 g sugar
2 tbs flour
Bring milk to a boil in small saucepan. Meanwhile beat egg yolks, sugar and flour in small bowl with electric mixer until thick. Gradually beat in milk. Return mixture to saucepan and stir over heat until mixture boils and thickens. Cool to room temperature.

Step 4 - Éclairs
40 g butter
120 ml water
70 g flour
2 eggs
60 g melted dark chocolate
Combine butter with the water in small saucepan, bring to boil. Add flour, beat with a wooden spoon over heat until mixture comes away from base and side of saucepan and forms a small ball. Cool. Beat in eggs with electric mixer until mixture becomes glossy. 
Spoon mixture into piping bag. Pipe 5cm lengths of mixture 3cm apart onto prepared trays with baking paper. Bake at 220° C for 7 minutes, then reduce heat to 180° C and bake further 10 minutes or until they’re browned lightly and crisp. Carefully cut éclairs in half, removing any soft centre. Bake further 5 minutes or until they’re dried out. Cool to room temperature.
Spoon pastry cream into piping bag fitted wit 1cm plain tube. Pipe cream into éclairs halves, top with remaining halves. Spread with melted dark chocolate

Step 5 - Cream cheese frosting
300 g cream cheese
200 g icing sugar
Mix cream cheese and icing sugar in a small bowl, cover and refrigerate for at least one hour.

Step 6 - Assembling cake
Centre one meringue circle on serving plate. Spread with some cream cheese frosting. Repeat with second layer and some of the pastry cream. Place third layer on top and spread with cream cheese frosting. Top with remaining cake layer. Cover top and sides of cake with pastry cream. 
Decorate top and sides with éclairs, chocolate rectangles and small cream cheese dollops.


also visit: http://time-for-a-cake.blogspot.it/2013/11/cake-thirty-one.html

Sunday 20 October 2013

Cake thirty Choco Dream

Get inspired

It’s undoubtedly a cake for chocolate lovers. Although it’s hard to believe, there are some who don’t like chocolate! I do respect their opinion and in a way I kind of envy them, in fact they don’t have to resist the temptation to eat it, they don’t have to bear negative consequences, such as spots on your face or tummy troubles, but on the other side I feel sorry as they lose a whole world of flavours and delicious treats!
It’s not a difficult cake to make but you need time and it’s better if you start baking the cakes a day ahead, so that they’re cold when you need to pile them up and cover with chocolate frosting.
Don’t let the quantity of butter, sugar and chocolate scare you, the result is superb!
I personally like it as a square cake, but any shape is fine....

Dark Chocolate Mud Cake
150 g dark chocolate
250 g butter, chopped
440 g sugar
250 ml milk
225 g flour
75 g self-raising flour
2 eggs, lightly beaten

Combine butter, chocolate, sugar and milk in a saucpean. Stir over heat, without boiling, until smooth. Cool 15 minutes. Add flours and eggs. Mix well. 
Line bases and sides of a deep 20cm-square cake pan with baking paper.. Pour mixture into prepared pan. Bake at 150° for about 50 minutes. Cool cake.

White Chocolate Mud Cake
150 g white chocolate
250 g butter, chopped
440 g sugar
250 ml milk
225 g flour
75 g self-raising flour
2 eggs, lightly beaten
Follow the same procedure as Dark Chocolate Mud Cake

Chocolate mixture
300 g milk chocolate, chopped coarsely
300 g dark chocolate, chopped coarsely
250 ml cream 
Combine milk chocolate and cream in a saucepan, stirring over low heat until smooth. Cover and refrigerate until mixture is of spreadable consistency. 

White chocolate mixture
300 g milk chocolate, chopped coarsely
125 ml cream
Follow the same procedure as Milk chocolate mixture


Assemblage and Decoration
White sanding sugar 


Split the two cakes in 
half.
Put one cake on serving plate, starting with a white one.
Spread with chocolate mixture. 
Repeat with second layer, a dark cake this time, and half of the white chocolate mixture.

Continue with third layer, a white cake now, and spread with chocolate mixture.
Top with remaining dark cake layer and spread with white chocolate mixture.Refrigerate until chocolate mixtures are firm. Then cover top layer and sides with remaining chocolate mixture.Decorate with white sanding sugar and refrigerate until icing is firm.

Sunday 25 August 2013

Cake twenty-nine Symphony in red, black and white

Get inspired

This time my task was not easy: cupcakes which had to be ready one day ahead and needed to be transported for about 200 km. and, to make things more complicated, we'd have to eat them in the university courtyard with no tables or seats available. We went on for weeks talking about the right size of the cupcakes, the right recipe, the type of icing or frosting and, of course, of decoration that would resist a three-hour drive. We also needed a tray or something similar to transport them safely to destination, something nice of course that’d suit a graduation ceremony.
After some wandering in town I found a plexiglass tray that looked perfect for this purpose, but I still didn’t know how to keep the cupcakes well separated one from the other: I was afraid they’d be all messed up and the decoration would be destroyed. Coffee beans was the answer! And it did work well! The cupcakes arrived in a perfect state and what’s more they had an unexpected aftertaste of coffee that made them special!
We chose to make two different tastes with different decorations and decided on the smaller size for the cupcakes  The colours would be red and white for one type (red is the  typical colour for graduation here) and black and white for the other type. 

Symphony in red and white
250 g butter
250 g flour
250 g sugar
3 eggs
150 g choco chips
Beat the butter and sugar until light and fluffy. Add the eggs, one at a time (don’t forget to beat in some flour between additions) and then the flour. Fold in the chocolate chips. Pour mixture into cupcake cases and bake at 180° for about 15 minutes. 

White chocolate frosting
100 g white chocolate, chopped
3 tbs milk 
175 g icing sugar 
Put the chocolate and the milk in a heatproof bowl and rest the bowl over a saucepan of gently simmering water. Leave until the chocolate has melted, stirring frequently.
Remove the bowl from the heat and stir in the icing sugar until smooth. Use freshly made. 

Decoration
red food coloring
chocolate sprinkles
red sugar sprinkles
Divide the white chocolate frosting and put them into two bowls. Beat some red food coloring into one bowl until the desired shade is reached. Put the red frosting into a pastry bag and pipe generous swirls of frosting over the cupcakes and decorate with chocolate sprinkles. Repeat same operation with the white chocolate frosting.

Symphony in black and white
250 g butter, chopped
150 g white chocolate, chopped coarsely
225 g flour
75 g self-raising flour
440  g sugar
250 ml milk
2 eggs, beaten lightly
150 g choco chips
Combine butter, white chocolate, sugar and milk in medium saucepan. Stir over heat, without boiling, until smooth. Cool 15 minutes. Whisk flours into white chocolate mixture then whisk in eggs. Pour mixture into prepared cupcake cases and bake at 150° for about 20 minutes. 


White Chocolate frosting
see above

Dark Chocolate Frosting
100 g dark  chocolate, chopped
2 tbs milk 
50 g butter
150 g icing sugar 
Put the chocolate, the milk and the butter in a heatproof bowl, stirring frequently until the chocolate and butter have melted. 
Remove the bowl from the heat and stir in the icing sugar until smooth and shiny.

Decoration
red sugar sprinkles 
chocolate sprinkles
Put the white frosting into a pastry bag and pipe generous swirls of frosting over the cupcakes and decorate with chocolate 
sprinkles. Repeat same operation with the dark frosting.

also visit: 
http://time-for-a-cake.blogspot.it/2013/08/cake-twenty-nine.html

Sunday 4 August 2013

Cake twenty-eight Lilac Chic

Get inspired

There’s something in the tiered cakes which attracts me a lot. It’s like a personal challenge, the kind of ‘Will I be able to make it?’, in other words a chance to test my skills. Sure, but not only! There’s also some unconscious reason which takes me back to a happy memory from my childhood: a photo of one of my first birthdays, me with my parents and a two-tiered birthday cake decorated in white with some silver pearls my mum had made for me.. 
Although decoration is very important as it’s what we see first, the choice of the cake is nonetheless relevant since it’s what we actually eat.
When making a tiered cake you should always choose a solid cake which can stand the weight of the other cakes you put on top. 
For this cake we chose three different cakes which all have, anyway, a common ingredient - chocolate. (My younger daughter loves it...)

Phase 1: Recipes

Dark Chocolate Mud Cake
250 g butter, chopped
150  g dark chocolate, chopped
440 g sugar
250 ml milk 
225g flour
75 g self-raising flour
2 eggs, lightly beaten 
2 tbs cocoa powder
150 g fresh raspberries
Put butter, chocolate, sugar and milk in medium saucepan, stir over heat without boiling, until smooth. Cool 15 minutes. Add flours, eggs and raspberries.  
Line base and sides of a 30cm-round cake pan with baking paper. Pour mixture into pan. Bake at 150° for 50 minutes. Cool cake.

White Chocolate Mud Cake
250 g butter, chopped
150  g white chocolate, chopped
440 g sugar
250 ml milk 
225g flour
75 g self-raising flour
2 eggs, lightly beaten 
2 tbs cocoa powder
150 g fresh blackberries or 150 g choco drops
Same procedure as Dark Chocolate Mud Cake.
Bake two cakes: one in a 30cm round cake pan - use blackberries; the second one in a 24cm round cake pan - use chocolate drops.

Chocolate icing
200 g chocolate, chopped
200 g icing sugar
1 egg
Melt chocolate in small saucepan over boiling water. Cool. Add egg and icing sugar. Stir until smooth.

Chocolate Butterscotch Cake
25 g cocoa powder
250 g butter
200 g brown sugar
2 eggs
1 tbs golden syrup
185 g self-raising flour
125 ml milk
Beat cocoa, butter, brown sugar, eggs, golden syrup, flour and milk with electric mixer until combined.
Line base and sides of a 18 cm-round cake pan with baking paper. Pour mixture into pan. Bake at 180° for about 1 hour. Cool cake.

Mascarpone Cream
250 g mascarpone cheese
300ml thickened cream
Mix mascarpone and cream until soft peaks form.

Caramel Icing
60g butter
100g brown sugar
60ml milk 
240g icing sugar
Heat butter, brown sugar and milk in small saucepan, stirring constantly, without boiling, until sugar dissolves. Remove from heat. Add icing sugar and stir until smooth.

Phase 2: Tiers
Here’s a sketch of the cake showing details of each tier.
1. Chocolate Butterscotch Cake
2. White Chocolate Mud Cake (with raspberries)
3. White Chocolate Mud Cake (with choco drops)
4. White Chocolate Mud Cake (with raspberries)
5. Dark Chocolate Mud Cake (with blackberries)

A. Mascarpone & Caramel Icing
B. Choco Icing

Phase 3: Decoration
purple and peach food colour
600/700 g ready-made white fondant
some corn starch
Assemble and decorate each tier separately. 

Bottom tier
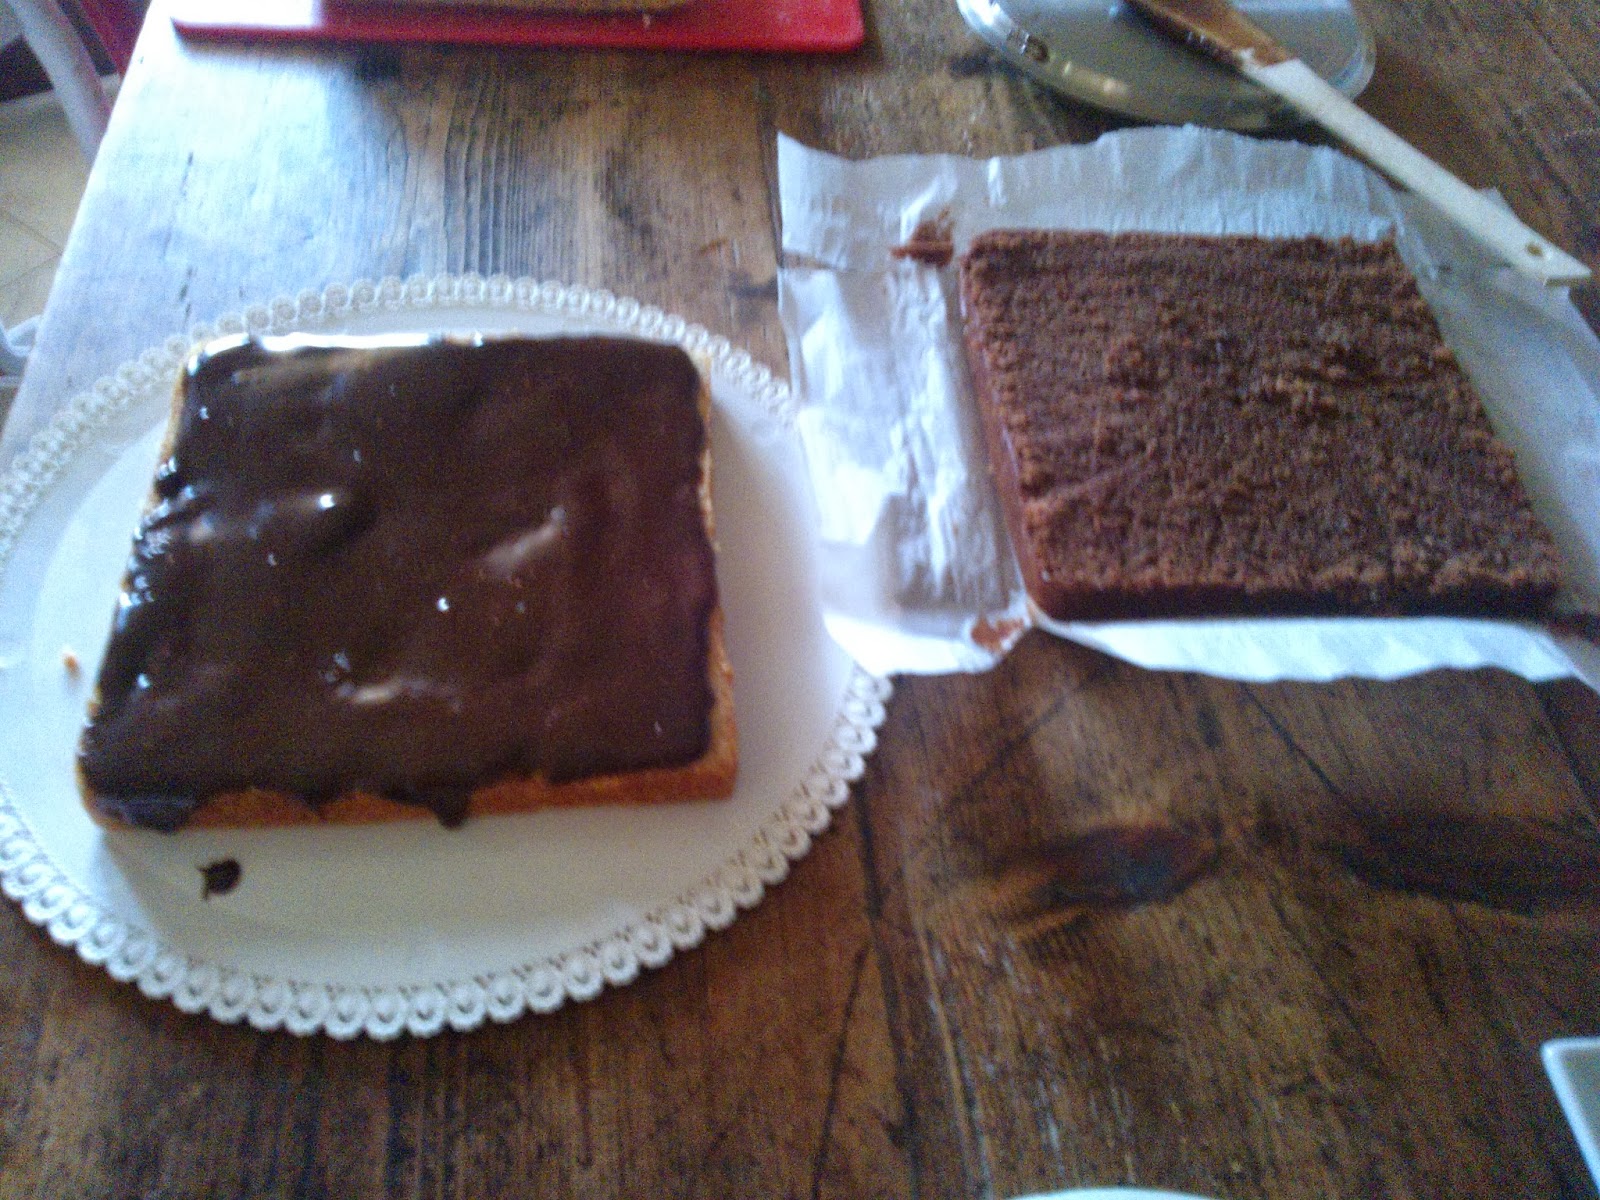
Take the Dark Chocolate Mud Cake and place it onto serving plate.  Spread with chocolate icing.
Take the 30cm round White Chocolate Cake and split into two layers. Put one layer on top of cake and leave second layer aside for middle tier.
Dust a large nonstick mat lightly with corn starch and knead fondant until smooth and pliable.
Roll fondant out in the approximate shape of the cake. Roll fondant up around rolling pin and then place it onto the cake. You can cut out the centre of the circle if you don't have enough fondant.
Add some purple and peach food colour to some white fondant and knead until you have the colour you like. Roll it out and cut about 30 2cm wide circles. 
Decorate cake with some of the circles using some mascarpone cream to help them stick to the cake.

Middle tier
Cut the second 30cm round White Chocolate Cake layer the same size as the 24cm round White Chocolate Cake. 
Place one 24cm round cake on a plate, spread with chocolate icing and put second cake on top.
Colour some fondant the same shade as the spots and follow same procedure as per cake from bottom tier.

Top tier
Split Chocolate Butterscotch Cake into three layers. Put one layer on a plate, spread with some mascarpone cream and some caramel icing. Repeat with second and third layer. Cover cake with white fondant and purple spots.

Phase 4: Assembling the cake 
Once all cakes are ready assemble the cake and carefully put one tier on top of the other.